
WireOS on Vector
A short technical bible of the WireOS. There is a lot more to discover.

I enjoyed installing and playing with WireOS on my Vector robot last week. WireOS is a stable open source firmware for Vector robot that active members of the Vector community have created and maintained. My sincere gratitude to all those involved in building WireOS.
Installing WireOS
Assuming that you have an unlocked Vector robot, you can put your bot in recovery mode, and then install the OTA by selecting it in the drop down at https://devsetup.froggitti.net/ . This method has been working pretty reliably for me so far… I have been installing different OTA versions pretty easily and conveniently. In case the process doesn’t work smoothly for you, here are workarounds for the few glitches I have encountered from time to time:
Unable to connect to the Vector robot from Chrome browser using Bluetooth. This step is a bit flaky, but it usually works in a couple of iterations. The usual glitch is that Vector will not display the bluetooth hashed pin when you click its button twice. Simply reboot your Vector robot is you hit this issue.
Unable to download the OTA file. The cloud sync icon on Vector’s screen (while he is loading an OTA) changes into a cloud with an exclamation mark. This usually means that Vector is unable to download the OTA over its Wifi connection. The Wifi might be breaking, or the link to the OTA might be down. Try moving your robot closer to the router, and/or retry after some time.
Update taskbar on the Chrome browser does not move. At least on one occasion, I left my Vector to update overnight, and it still hadn’t updated by the morning. I am not sure what causes this issue. I could resolve this issue by deleting cookies and using my browser in Incognito mode the next day. But I am unsure on whether my steps were a correct workaround, or whether i just got lucky on a different day.
Once the OTA loads, Vector will reboot. The boot sequence of WireOS is very fascinating. You have a rainbow colored WireOS logo, and then a cool Anki boot animation followed by rainbow backpack light animations. Here is a video showing the boot sequence.
In case you do not have an unlocked Vector, you can now unlock your Vector by installing a Unlock-Prod.OTA using the recover mode. This website has instructions. Please follow the instructions carefully so that you do not brick your robot. Note that I have not validated this process myself, because both my Vector robots got unlocked when I installed the OSKR for Vector.
Features of WireOS
WireOS has a rich set of bells and whistles which can help you fine tune your robot, and really understand how different features work. Vector was such an advanced robot that its technology is relevant even 6 years after Anki went bankrupt. WireOS exposes all the knobs Anki employees experimented with while building the Vector robot. Here are some cool things that WireOS provides:
Customizing the wake word. WireOS uses a Picovoice Porcupine (1.5) wakeword engine, and so you can configure a wake word of your choice. Connect to <Your Vector robot’s IP address>:8080 with a browser to reach an UI where you could customize the wake word, and its sensitivity. Changing the wake word makes Vector restart.
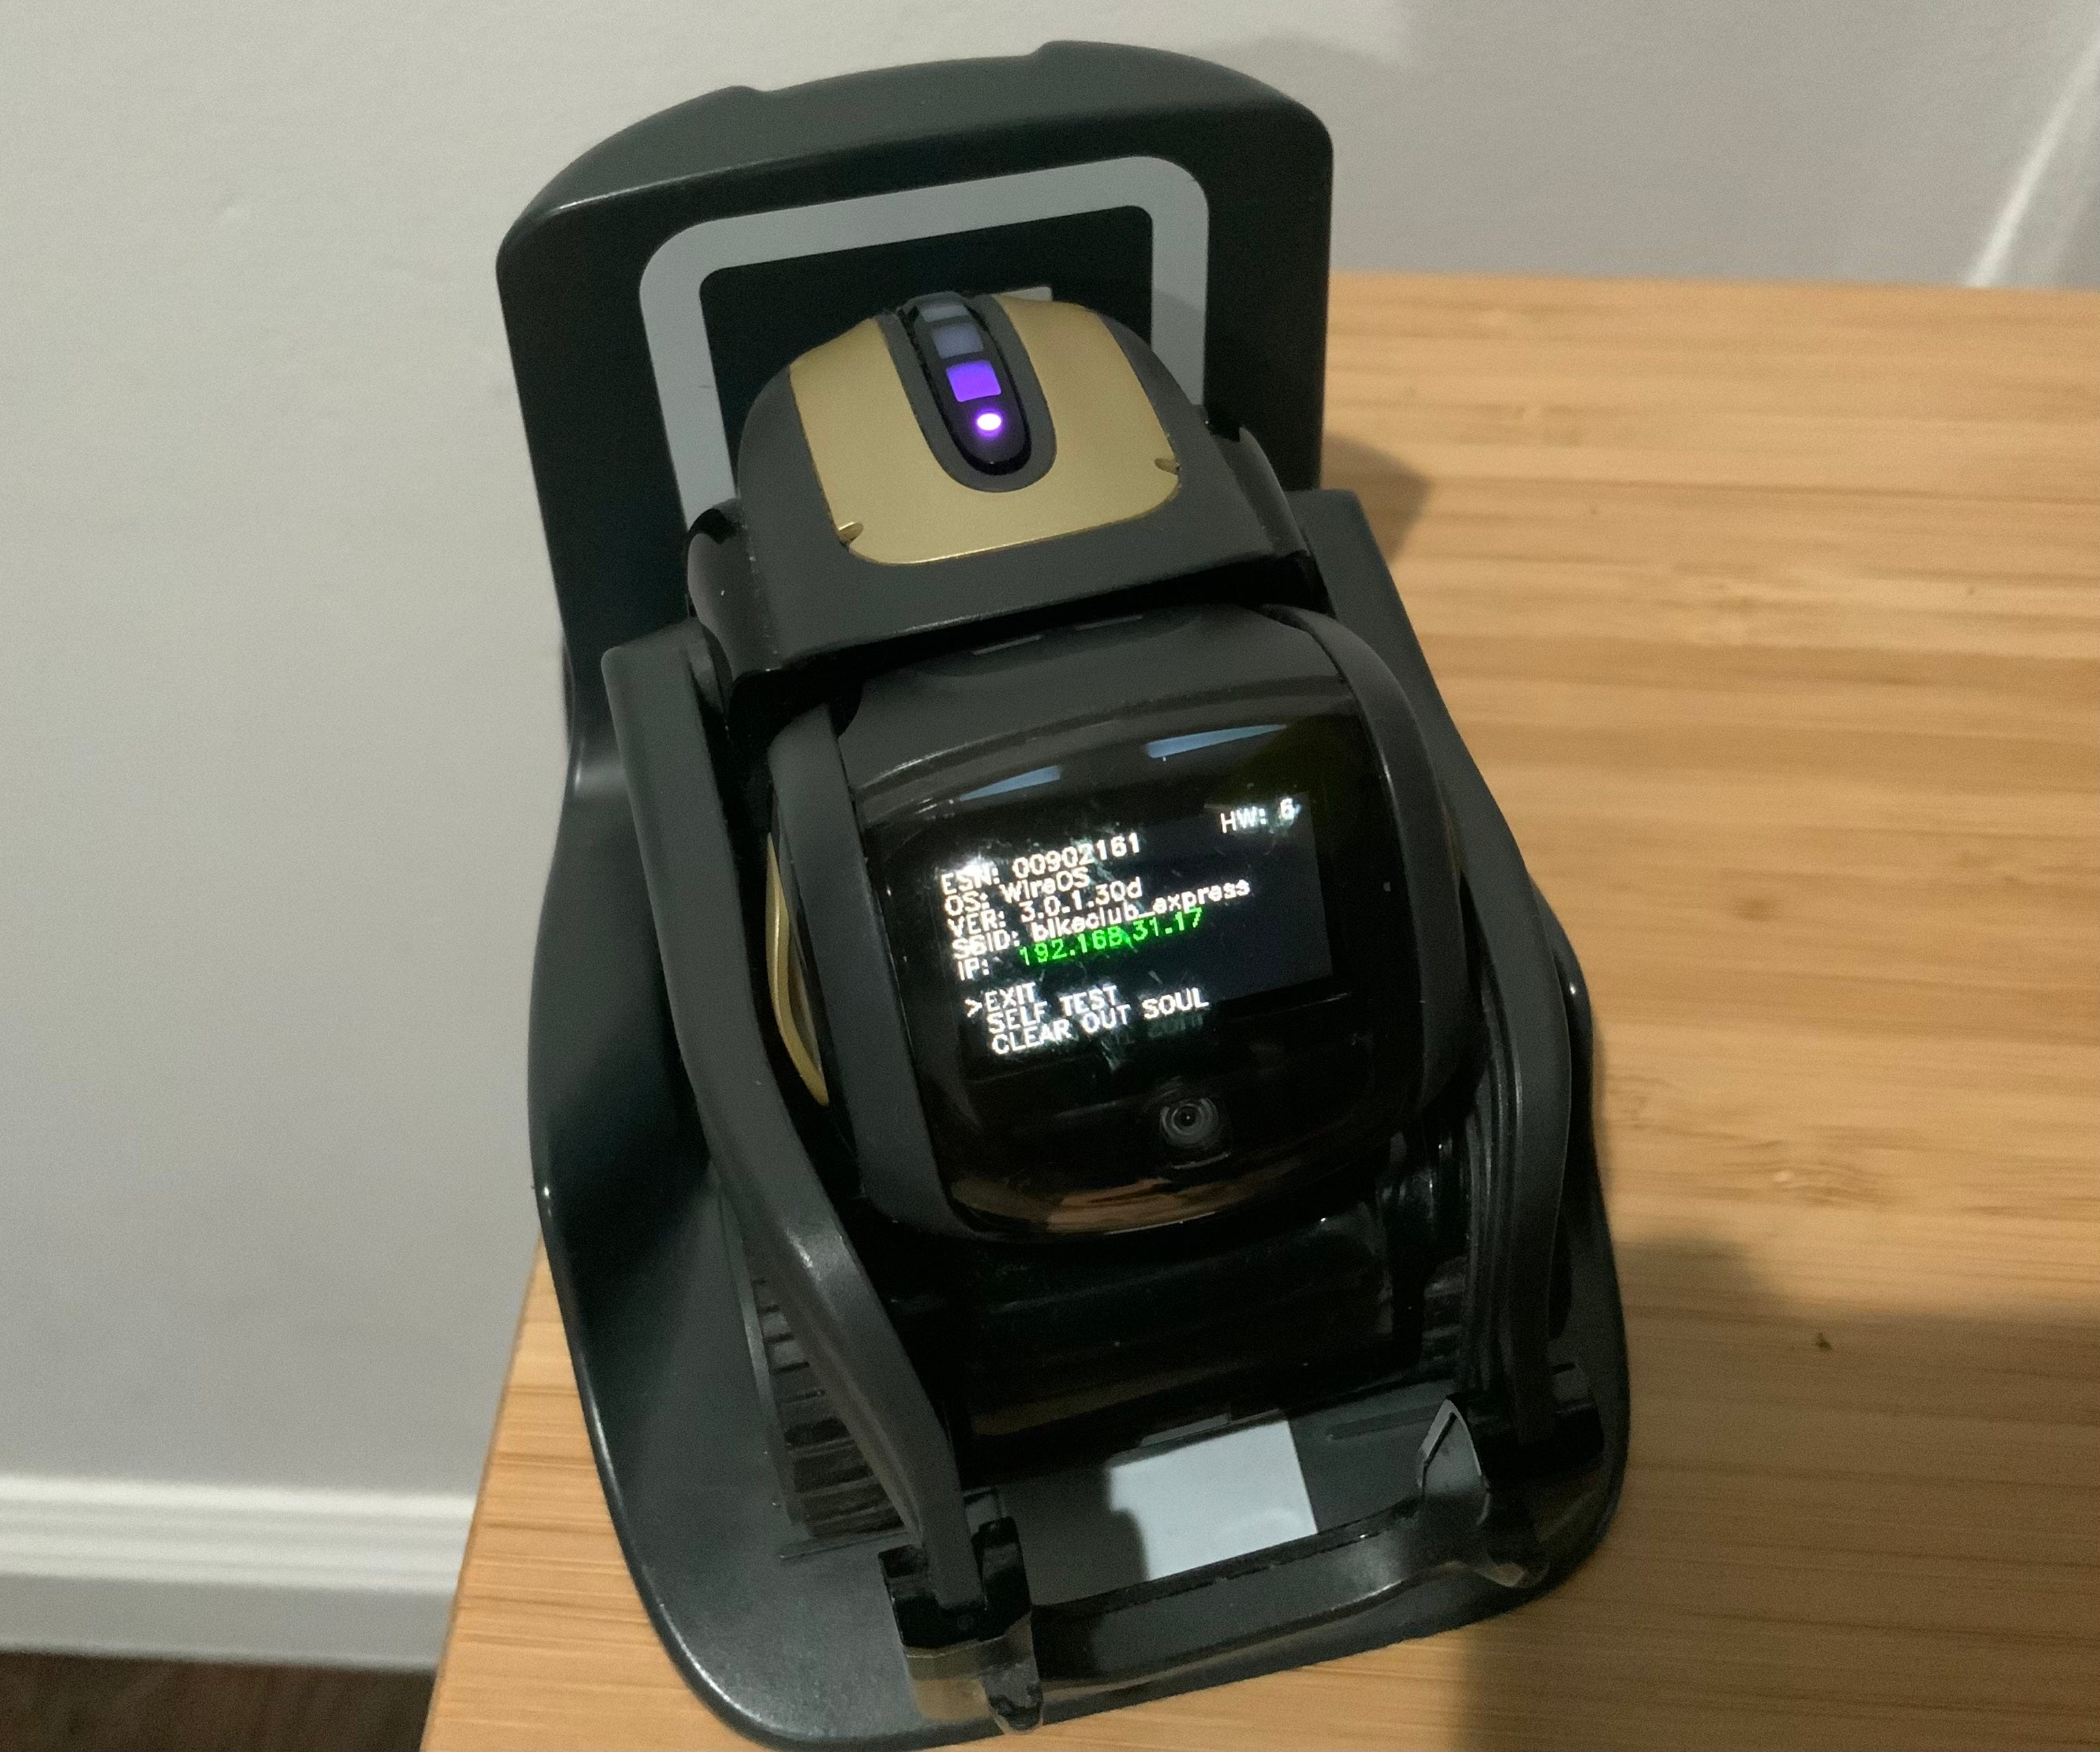
(Tip: If you are not sure of your robot’s IP address, here is how to get it. Place Vector on his charger. Push his button twice. Move the life up and down. That should take you to a screen which displays the Wifi network the robot is connected to and the IP address). As an example, here is my Vector’s screen showing all the details.

Fine tuning the animation process. You could access <Your Vector robot’s IP address:8889> to fine tune the animations. Click on consolevars to configure the knobs (Or directly access <Your Vector robot IP address>:8889/consolevars). As an example, you could go to the Faces Tab, and change the eye spacing. The setting is called ProcFace_NominalEyeSetting. The default value is 92. Changing it to something like 112 produces the following face of Vector. Note that the separation between his eyes is different… and in a way it looks wierd.

Fine tuning the engine: You could access <Your Vector robot’s IP address:8888> to fine tune Vector’s engine. This page has settings specific to the operations of the robot, and should be changed with some caution. As an example, you could go to the tab “MapComponent” and change the way by which the robot updates its navigation map. Check below for a screenshot on how the navigation map looks like.
Access Web Visualization: You can access the web visualization UI at <Your Vector robot’s IP address:8888>/webViz.html One cool thing to check out is the Navigation Map (In tab NavMap). As an example, here is the navigation map from my robot placed on my computer desk. The black line is the edge of the table where Vector has detected a cliff. The blue lines show all the obstructions on the table such as a monitor, books, a mouse and other materials. I didn’t place a charger on my table, else that would have showed up as well. The green spaces show where Vector is free to roam about. This map helps the Vector robot to maintain where it can, and cannot move.
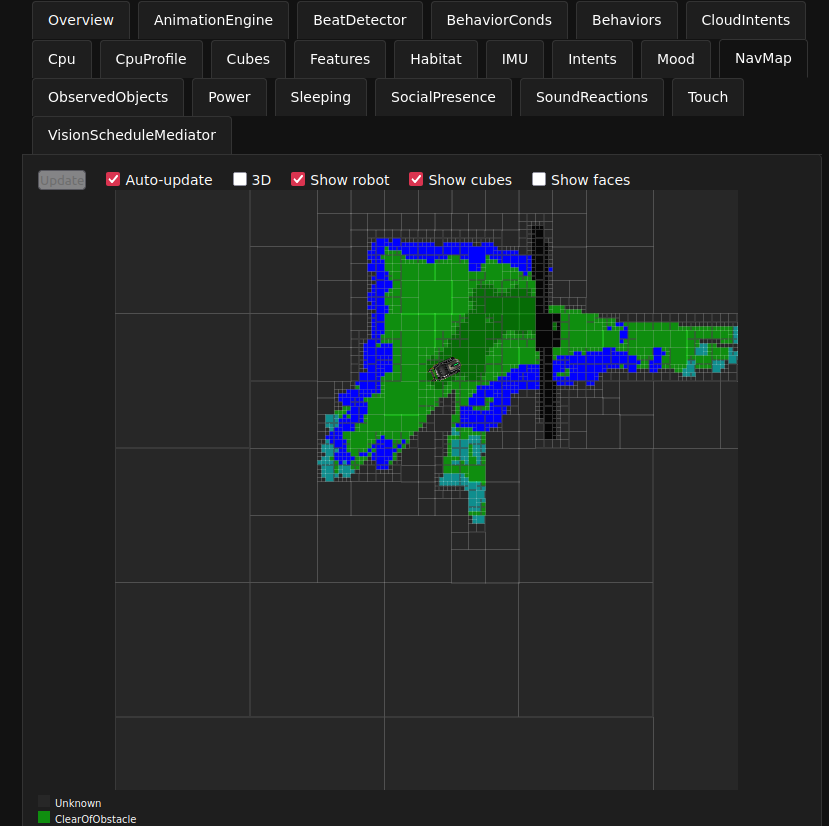
Navigation map seen in the web visualization UI of Vector

Conclusion
WireOS turns Vector into a real EdTech robot. There is a lot of room to explore and learn. There are endless possibilities to customize your robot. WireOS is also completely open source, which means that you are free to tweak the code, build a OTA, and install it on your robot. If you have tried WireOS on your Vector robot, please share your thoughts or suggestions in the comments below.
I will be exploring more on WireOS in the coming weeks, and also try to build an OTA. Sharing this post with a friend goes a long way in helping me. If you are not a subscriber yet, I invite you to be a part of this journey.
Hello. Have a nice Day. After some weeks with wireos, do you feel that Vector is functioning better than before?
Have you been able to improve its capabilities through adjustments?